Substrate Basics
17 tips in Substrate Preparation
By Andrew Langevin · Founder, Nature Lion Inc · Contributing author, Mushroomology (Brill, 2026)
Substrate is the material that mushroom mycelium colonizes and feeds on. It is the food source and growing medium combined into one. Different mushroom species have evolved to digest different types of organic material — wood-loving species like shiitake thrive on hardwood sawdust, while oyster mushrooms can break down straw, cardboard, and even coffee grounds.
The ideal substrate provides a balance of carbon and nitrogen, holds adequate moisture, and has the right physical structure for mycelium to penetrate. Common substrates include coco coir, hardwood sawdust, straw, grain, manure, and various combinations of these materials.
Choosing the right substrate for your target species is one of the most important decisions in any grow.
Spawn is a small quantity of fully colonized grain that serves as your inoculum — the seed of your grow. Substrate is the bulk material that the spawn colonizes. Think of spawn like a sourdough starter and substrate like a fresh batch of dough. You use a small amount of spawn to inoculate a much larger volume of substrate.
Spawn is always made on nutrient-rich grain (rye, wheat, oats, millet) and is prepared under sterile conditions using a pressure cooker. Substrate, depending on type, may only need pasteurization rather than full sterilization.
A typical ratio is 1 part spawn to 2-5 parts substrate by volume. You never fruit directly from spawn (except in some grain-to-grain transfers) — the purpose of spawn is to multiply your genetics efficiently before introducing them to a bulk growing medium.
Mushrooms are saprotrophic organisms that feed primarily on lignocellulosic material — the structural compounds in plant cell walls. The three main components they break down are cellulose, hemicellulose, and lignin. Different species produce different combinations of enzymes to digest these compounds.
White-rot fungi like oyster mushrooms and shiitake can break down lignin, the toughest component of wood. Brown-rot fungi break down cellulose and hemicellulose but leave lignin mostly intact.
The carbon-to-nitrogen ratio (C:N) of your substrate matters enormously. Most mushroom substrates work best at a C:N ratio between 30:1 and 80:1. Too much nitrogen encourages bacterial growth and contamination. Too little slows colonization and reduces yields. This is why pure hardwood sawdust (very high carbon) is often supplemented with nitrogen-rich additives like soy hull pellets or wheat bran.
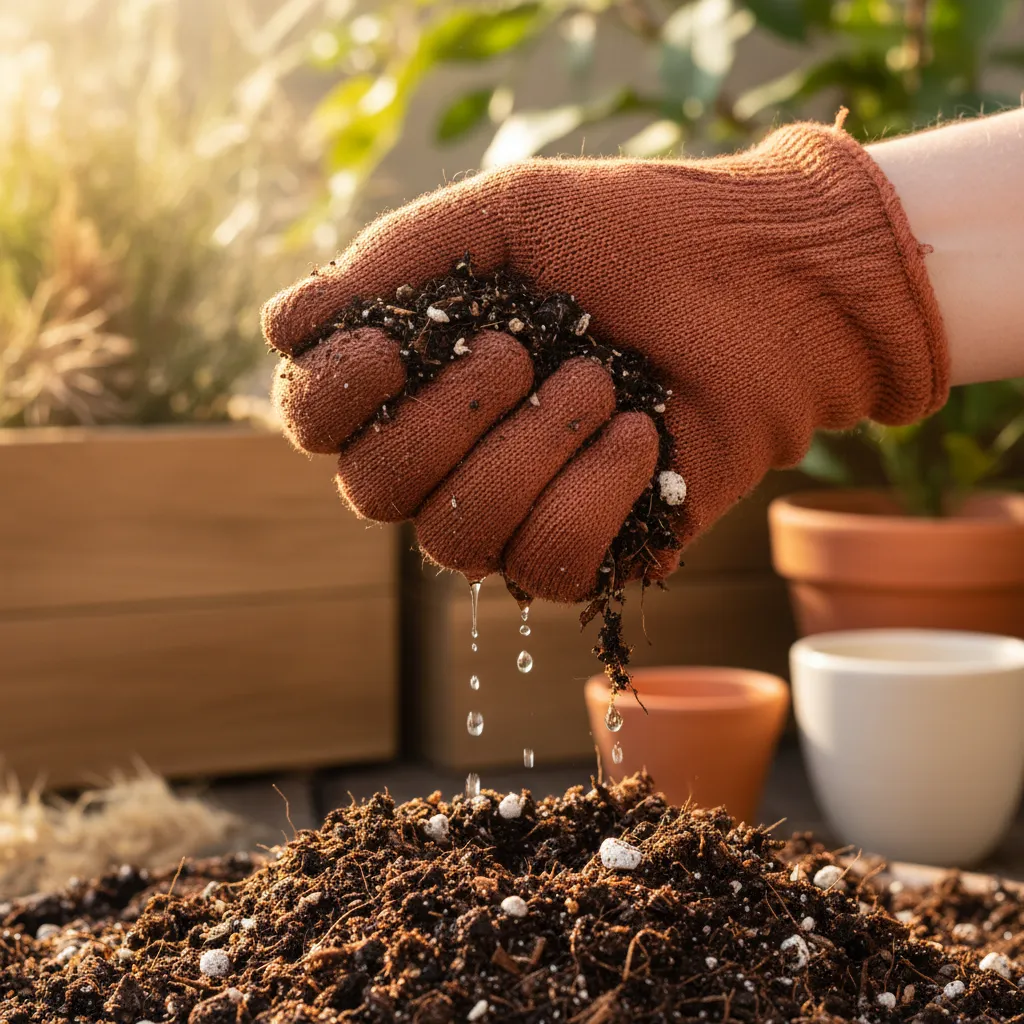
Field capacity is the ideal moisture content for mushroom substrate — the point where the material holds the maximum amount of water without dripping. For most substrates, field capacity is approximately 60-65% moisture by weight.
The squeeze test is the standard way to check it: grab a fistful of prepared substrate and squeeze it as hard as you can. At perfect field capacity, only 2-3 drops of water should come out. If water streams out, the substrate is too wet. If no drops come at all, it is too dry.
For coco coir-based substrates, aim for the material to feel like a wrung-out sponge. For straw, squeeze hard and expect just a thin trickle. This test is simple but critical — getting moisture right is one of the biggest factors in successful colonization and contamination prevention.
Raw substrate contains billions of competing microorganisms — bacteria, molds, yeasts, and wild fungi — that will outcompete your mushroom mycelium for nutrients. Without treatment, these contaminants colonize the substrate faster than your target species and ruin the grow.
Sterilization and pasteurization reduce or eliminate these competitors, giving your mushroom mycelium a head start. The method you choose depends on the substrate's nutrient density.
Highly nutritious substrates like supplemented sawdust or grain require full sterilization (killing everything) because any surviving organism will explode on the rich food source. Less nutritious substrates like plain straw or coco coir can be pasteurized (reducing but not eliminating microbes), because the remaining beneficial bacteria actually help protect against mold by occupying ecological niches without competing with mushroom mycelium.
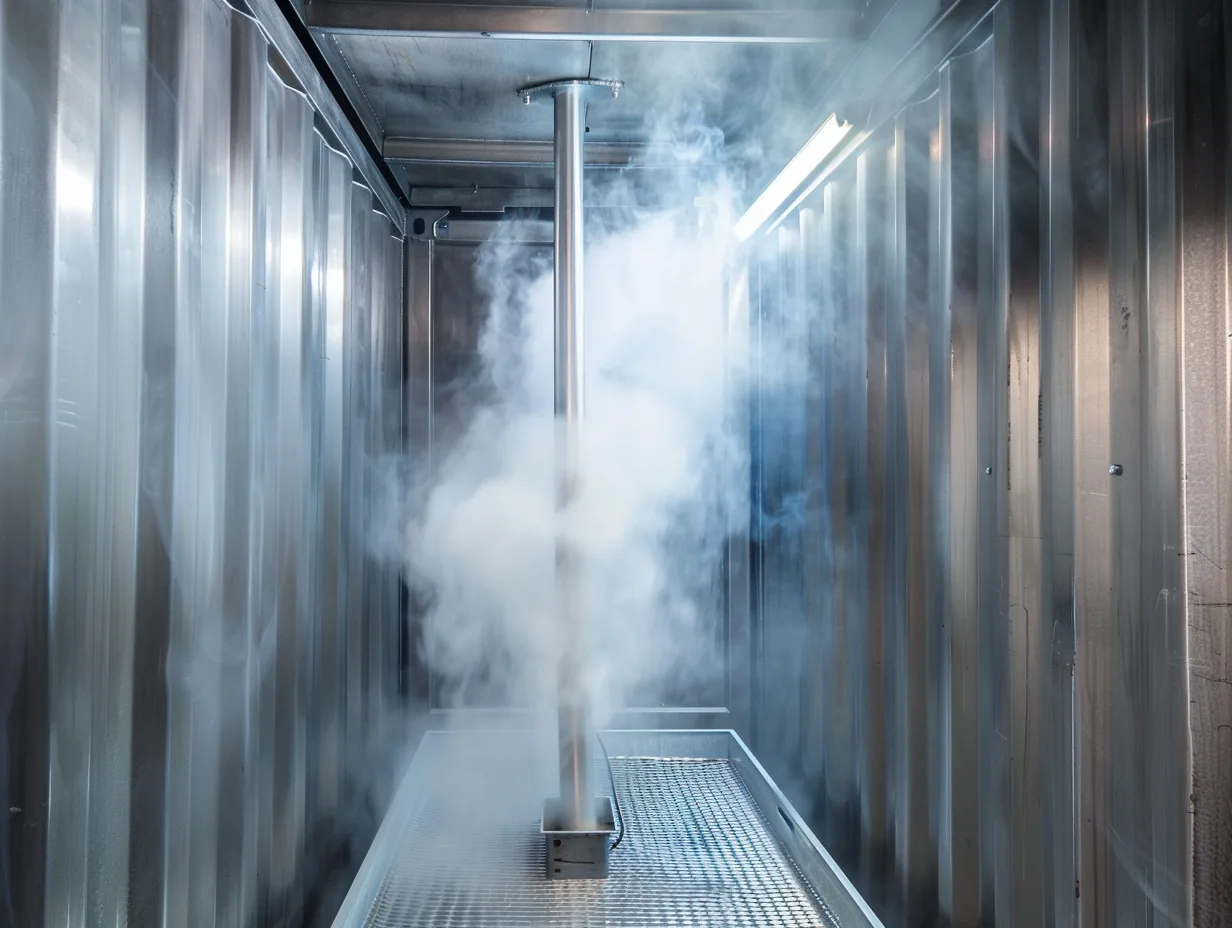
Sterilization kills all living organisms, spores included, by exposing substrate to temperatures above 121C (250F) under pressure for extended periods — typically 90-150 minutes at 15 PSI in a pressure cooker. This creates a completely blank slate, which is necessary for nutrient-rich substrates.
Pasteurization reduces microbial populations by exposing substrate to lower temperatures — typically 71-82C (160-180F) for 60-90 minutes. It kills most pathogens and molds but leaves heat-resistant beneficial bacteria alive. These survivors create a competitive environment that actually helps prevent recontamination.
The key distinction: sterilized substrate must be handled with perfect sterile technique because any stray spore can colonize the clean, nutrient-rich material. Pasteurized substrate is more forgiving because the surviving beneficial microbes provide a biological defense layer. This is why beginners often have better success with pasteurized bulk substrates like coco coir than with sterilized supplemented sawdust.
Sterilize when your substrate contains high nitrogen or supplementation:
- All grain spawn
- Supplemented hardwood sawdust (Masters Mix)
- BRF cakes
- Agar media and liquid culture
- Any substrate with added bran, soy hulls, or other protein-rich supplements
These nutrient-dense materials are contamination magnets and need total sterilization.
Pasteurize when your substrate is low-nutrient and primarily carbon-based:
- Plain coco coir
- Straw and cardboard
- Non-supplemented hardwood chips
- Manure-based substrates
CVG (coco coir, vermiculite, gypsum) is always pasteurized, never sterilized — sterilizing it would actually remove the beneficial bacteria that make CVG so contamination-resistant. A useful rule: if you added anything to boost nutrition (bran, soy, coffee grounds), sterilize it. If the substrate is plain and low-nutrient, pasteurize it. When in doubt, pasteurize — it is simpler and more forgiving for beginners.
Supplementation means adding a nitrogen-rich ingredient to your base substrate to boost nutritional content, which increases mushroom yields. Common supplements include:
- Wheat bran: 5-10% of dry substrate weight
- Soy hull pellets: up to 50% for Masters Mix
- Rice bran: similar rates to wheat bran
- Gypsum (calcium sulfate): typically 1-2% by weight
Supplementation increases yields by 20-50% but also dramatically increases contamination risk. Every supplement must be sterilized — never pasteurize a supplemented substrate.
For beginners, skip supplementation entirely and grow on plain CVG or straw. Intermediate growers can start with 5% wheat bran added to hardwood sawdust. Advanced growers use Masters Mix (50/50 hardwood pellets and soy hull pellets) for maximum yields on species like lion's mane and king oyster. Gypsum is a special case — it improves substrate structure and provides calcium without significantly increasing contamination risk, so it can be added to pasteurized substrates.
Nitrogen is essential for mushroom growth — mycelium uses it to build proteins and enzymes. But too much nitrogen is one of the fastest ways to get contamination. Bacteria and molds thrive on nitrogen-rich environments and grow faster than mushroom mycelium, so high-nitrogen substrates are extremely vulnerable without perfect sterilization.
The optimal carbon-to-nitrogen ratio for most gourmet species is between 30:1 and 80:1. Here are common substrate C:N ratios:
- Straw: ~80:1 (very low nitrogen, very safe)
- Hardwood sawdust: ~350-500:1 (extremely low nitrogen)
- Supplemented sawdust with soy hulls: ~40-60:1
- Fresh manure: ~15:1 (very high nitrogen, contamination-prone)
- Pure coffee grounds: ~20:1 (dangerously high for unsupplemented use)
This is why experienced growers measure and control nitrogen levels carefully, and why beginners should stick to low-nitrogen substrates like plain coco coir until their sterile technique improves.
Substrate above field capacity — where water pools at the bottom or streams out when squeezed — creates anaerobic (oxygen-deprived) zones that are a breeding ground for bacterial contamination.
Symptoms of too-wet substrate include:
- Sour or fermented smells within days of spawning
- Slimy or glossy patches on the surface
- Slow or stalled colonization
- Standing water at the bottom of your container
- Bacterial blotch on mushroom caps during fruiting
Excess moisture suffocates mycelium, which needs oxygen to grow. If you catch the problem early on grain, you can spread it on a clean surface to dry. For bulk substrate, add more dry coco coir or vermiculite to absorb excess moisture before spawning.
Prevention is key: always perform the squeeze test before mixing in spawn, and err on the side of slightly too dry rather than too wet. Slightly dry substrate colonizes slower but stays clean. Too-wet substrate almost always contaminates.
Substrate below field capacity slows colonization dramatically and can stall it entirely. Mycelium needs moisture to transport nutrients and grow — without adequate water, the hyphal tips dry out and stop extending.
Symptoms of too-dry substrate include:
- Slow or patchy colonization
- Thin wispy mycelium that doesn't fully cover the surface
- Cracking or shrinking substrate pulling away from container walls
- Poor or absent pinning during fruiting
If your substrate is too dry before spawning, add small amounts of water and mix thoroughly, then re-check with the squeeze test. If you discover the problem after spawning, lightly mist the surface with water but avoid soaking — heavy watering can introduce contamination.
For bulk substrates in monotubs, a dry substrate can sometimes be rescued by increasing humidity to 95% and gently misting the surface twice daily. For grain spawn, there is no fix after sterilization — dry grain must be re-prepared.
Yes, but most growers don't need to worry about it. Most mushroom species prefer slightly acidic to neutral substrate with a pH of 5.5-7.0. Coco coir naturally sits around 5.5-6.5, straw around 6.0-7.5, and hardwood sawdust around 4.5-5.5 — all within acceptable range. Gypsum acts as a mild pH buffer when added to substrate.
For water quality, standard municipal tap water is fine for most purposes. If your tap water is heavily chlorinated, let it sit uncovered for 24 hours to off-gas, or use a carbon filter. Chloramine (used in some cities instead of chlorine) does not off-gas and requires a carbon filter to remove.
Well water with very high mineral content (above 500 ppm total dissolved solids) can occasionally cause issues. Distilled or reverse-osmosis water is unnecessary for substrate preparation but is recommended for liquid culture and agar work where precision matters more.
The squeeze test is the single most important quality check in substrate preparation, and getting it right prevents the two most common substrate failures: bacterial contamination from excess moisture and stalled colonization from insufficient moisture.
Step-by-step squeeze test procedure:
- Grab a generous handful of prepared substrate — enough to fill your palm completely
- Squeeze firmly over a sink or bucket using your full grip strength for 3-5 seconds
- Count the drops that fall
Interpreting your results:
- 1-3 drops = perfect field capacity — The substrate holds maximum water without being waterlogged. This is your target for all mushroom substrates
- A steady stream = too wet — The substrate will breed anaerobic bacteria and likely contaminate. Spread it out to air-dry for 15-30 minutes and re-test
- 0 drops = too dry — Mycelium will colonize slowly or stall entirely. Add small amounts of water, mix thoroughly, and re-test
- 4-6 drops = slightly wet — Borderline acceptable but risky. Let it drain for 10 more minutes and re-test
Critical tips for accurate results:
- Test multiple handfuls from different areas of your batch — moisture distributes unevenly during mixing
- Re-test after adding spawn, as grain spawn contributes additional moisture
- For coco coir, the substrate should feel like a thoroughly wrung-out sponge — damp throughout but not dripping
- Slightly too dry is always safer than slightly too wet — you can add humidity during fruiting, but you cannot fix waterlogged substrate after inoculation
Substrate layering is the practice of alternating layers of substrate and spawn rather than mixing them together, and whether it matters depends on your growing method. For most home cultivators using monotubs, even mixing is superior to layering.
Layering vs mixing compared:
- Even mixing — Spawn is distributed uniformly throughout the substrate, creating hundreds of inoculation points that colonize in all directions simultaneously. This produces faster, more uniform colonization and is the standard for monotub cultivation
- Layering — Alternating 5-8 cm layers of substrate with thin layers of scattered spawn. Colonization radiates outward from each layer, which can leave gaps between layers and create uneven colonization
When layering works well:
- Bucket tek for oyster mushrooms — Layer straw and spawn in a 5-gallon bucket because the vertical column format benefits from distinct spawn layers at each hole level
- Log inoculation — Plug spawn is placed at regular intervals in drilled holes, which is inherently a layered pattern
- Very large containers where thorough mixing is physically difficult
When mixing is better:
- Monotubs — Always mix spawn evenly throughout CVG or other bulk substrate for fastest colonization
- Grow bags — Knead the bag after adding spawn to distribute grain throughout the sawdust
Spawn sandwiching — a thin layer of plain substrate on top with mixed spawn below — is a useful hybrid technique. The uncolonized casing layer helps maintain surface humidity and can reduce side pinning.
A fruiting block is a bag of supplemented hardwood sawdust that has been sterilized, inoculated with grain spawn, and colonized — it is the standard production unit for most gourmet mushroom species. Making your own fruiting blocks is more economical than buying grow kits and gives you control over substrate composition.
Complete process:
- Mix dry ingredients — Combine hardwood fuel pellets with soy hull pellets at a 50/50 ratio by weight (this is Masters Mix, the industry standard). For a 5 lb block, use approximately 1.1 kg of each
- Hydrate — Add water until the mixture reaches field capacity (squeeze test: 2-3 drops). Hardwood pellets expand dramatically when hydrated — add water gradually and mix thoroughly. Target approximately 60-65% moisture
- Add gypsum — Mix in 1-2% gypsum by dry substrate weight to improve structure and provide calcium
- Bag — Load the hydrated substrate into autoclavable mushroom grow bags with filter patches. Fill to approximately 2.3 kg (5 lbs) per bag with 10-15 cm of empty space above
- Seal — Fold the bag top and seal with an impulse sealer, keeping the filter patch exposed
- Sterilize — Pressure cook at 15 PSI for 2.5 hours. Supplemented substrates must be fully sterilized, never just pasteurized
- Cool — Let bags cool to room temperature (8-12 hours) before handling
- Inoculate — In front of a flow hood or inside a SAB, open the bag and add 15-20% grain spawn by weight (approximately 340-450g per 5 lb bag). Reseal and knead to distribute
Colonization takes 14-30 days at 21-24°C. Once fully white throughout, cut slits in the bag and move to fruiting conditions.
Hardwood fuel pellets are the most convenient and consistent sawdust source for mushroom cultivation — they are compressed, kiln-dried hardwood sawdust sold at hardware stores for pellet stoves. A 40 lb bag costs $5-8 and produces enough substrate for 8-10 fruiting blocks.
Why fuel pellets are superior to raw sawdust:
- Pre-sterilized — the pellet manufacturing process uses heat and compression that kills most contaminants
- Consistent particle size — every bag produces uniform sawdust when hydrated
- Easy to measure — dry pellets are dense and compact, making weighing accurate
- Widely available — sold at Tractor Supply, Home Depot, hardware stores, and online
How to hydrate fuel pellets:
- Weigh dry pellets — measure the amount needed for your recipe (typically 680g-1.1kg per 5 lb block)
- Add hot water — pour boiling or near-boiling water over the pellets at approximately a 1:1 ratio by weight (1 kg pellets + 1 kg water). The heat accelerates breakdown.
- Wait 20-30 minutes — the pellets absorb water and expand to 3-4x their original volume, crumbling into fluffy sawdust
- Break up clumps — use your hands or a tool to separate any remaining pellet cores
- Check moisture — perform the squeeze test. A firm handful should produce 2-3 drops of water. Add small amounts of water if too dry, or spread out briefly if too wet.
Important: only use HARDWOOD pellets. Check the label — pellets must be 100% hardwood (oak, maple, beech, cherry). Never use softwood pellets (pine, fir, spruce) — they contain antifungal terpenes that inhibit mycelium growth. Also avoid pellets with added binders, accelerants, or flavorings.
Once hydrated, mix with your supplement (wheat bran, soy hulls, etc.) and proceed with bagging and sterilization as normal.
Yes, water quality affects mushroom cultivation more than most growers realize, particularly during substrate preparation and humidification. The two biggest concerns are chlorine/chloramine and pH.
Chlorine and chloramine:
- Municipal tap water contains 0.5-2 ppm chlorine or chloramine as a disinfectant
- Chlorine can inhibit mycelium growth, especially during liquid culture preparation and substrate hydration
- Chlorine evaporates if water is left in an open container for 24 hours or boiled for 15-20 minutes
- Chloramine (used in many modern water systems) does NOT evaporate — it requires activated carbon filtration or treatment with campden tablets (potassium metabisulfite, 1/4 tablet per 20 liters)
- Check your local water utility report to determine which disinfectant is used
When water quality matters most:
- Liquid culture preparation — use dechlorinated or distilled water. Chlorine/chloramine can kill the mycelium in liquid culture at concentrations that would be harmless to a solid substrate
- Agar preparation — use distilled or dechlorinated water for clean results
- Substrate hydration — less critical because the sterilization or pasteurization process neutralizes chlorine. Standard tap water is usually fine for hydrating bulk substrates
- Humidifier water — use distilled water in ultrasonic humidifiers to prevent mineral dust (white residue) from coating your mushrooms
pH considerations:
- Most mushroom species prefer substrate pH of 5.5-6.5
- Highly alkaline well water (pH 8+) can shift substrate pH above optimal range
- Adding 1-2% gypsum to your substrate helps buffer pH regardless of water source
For most growers, tap water works fine for substrate preparation. Reserve distilled or filtered water for liquid culture, agar, and humidifiers where it genuinely makes a difference.
Need more help? Dr. Myco can answer follow-up questions about substrate basics based on thousands of real growing experiences.
Ask Dr. Myco