Advanced Contamination Diagnosis
17 tips in Contamination & Troubleshooting
By Andrew Langevin · Founder, Nature Lion Inc · Contributing author, Mushroomology (Brill, 2026)
Healthy mycelium changes appearance as it matures, and knowing what to expect at each stage prevents unnecessary panic over normal growth patterns.
During early colonization, you will see thin, wispy white threads radiating outward from each inoculation point. This is called rhizomorphic growth when the strands are rope-like and directional, or tomentose growth when they form a cottony blanket. Both are perfectly normal depending on the species and genetics.
- Days 1 to 5 — Small white dots or patches appear at inoculation points. Growth is barely visible
- Days 5 to 14 — White threads spread aggressively, connecting grain to grain or moving through substrate. The mycelium should look bright white and smell earthy or like fresh mushrooms
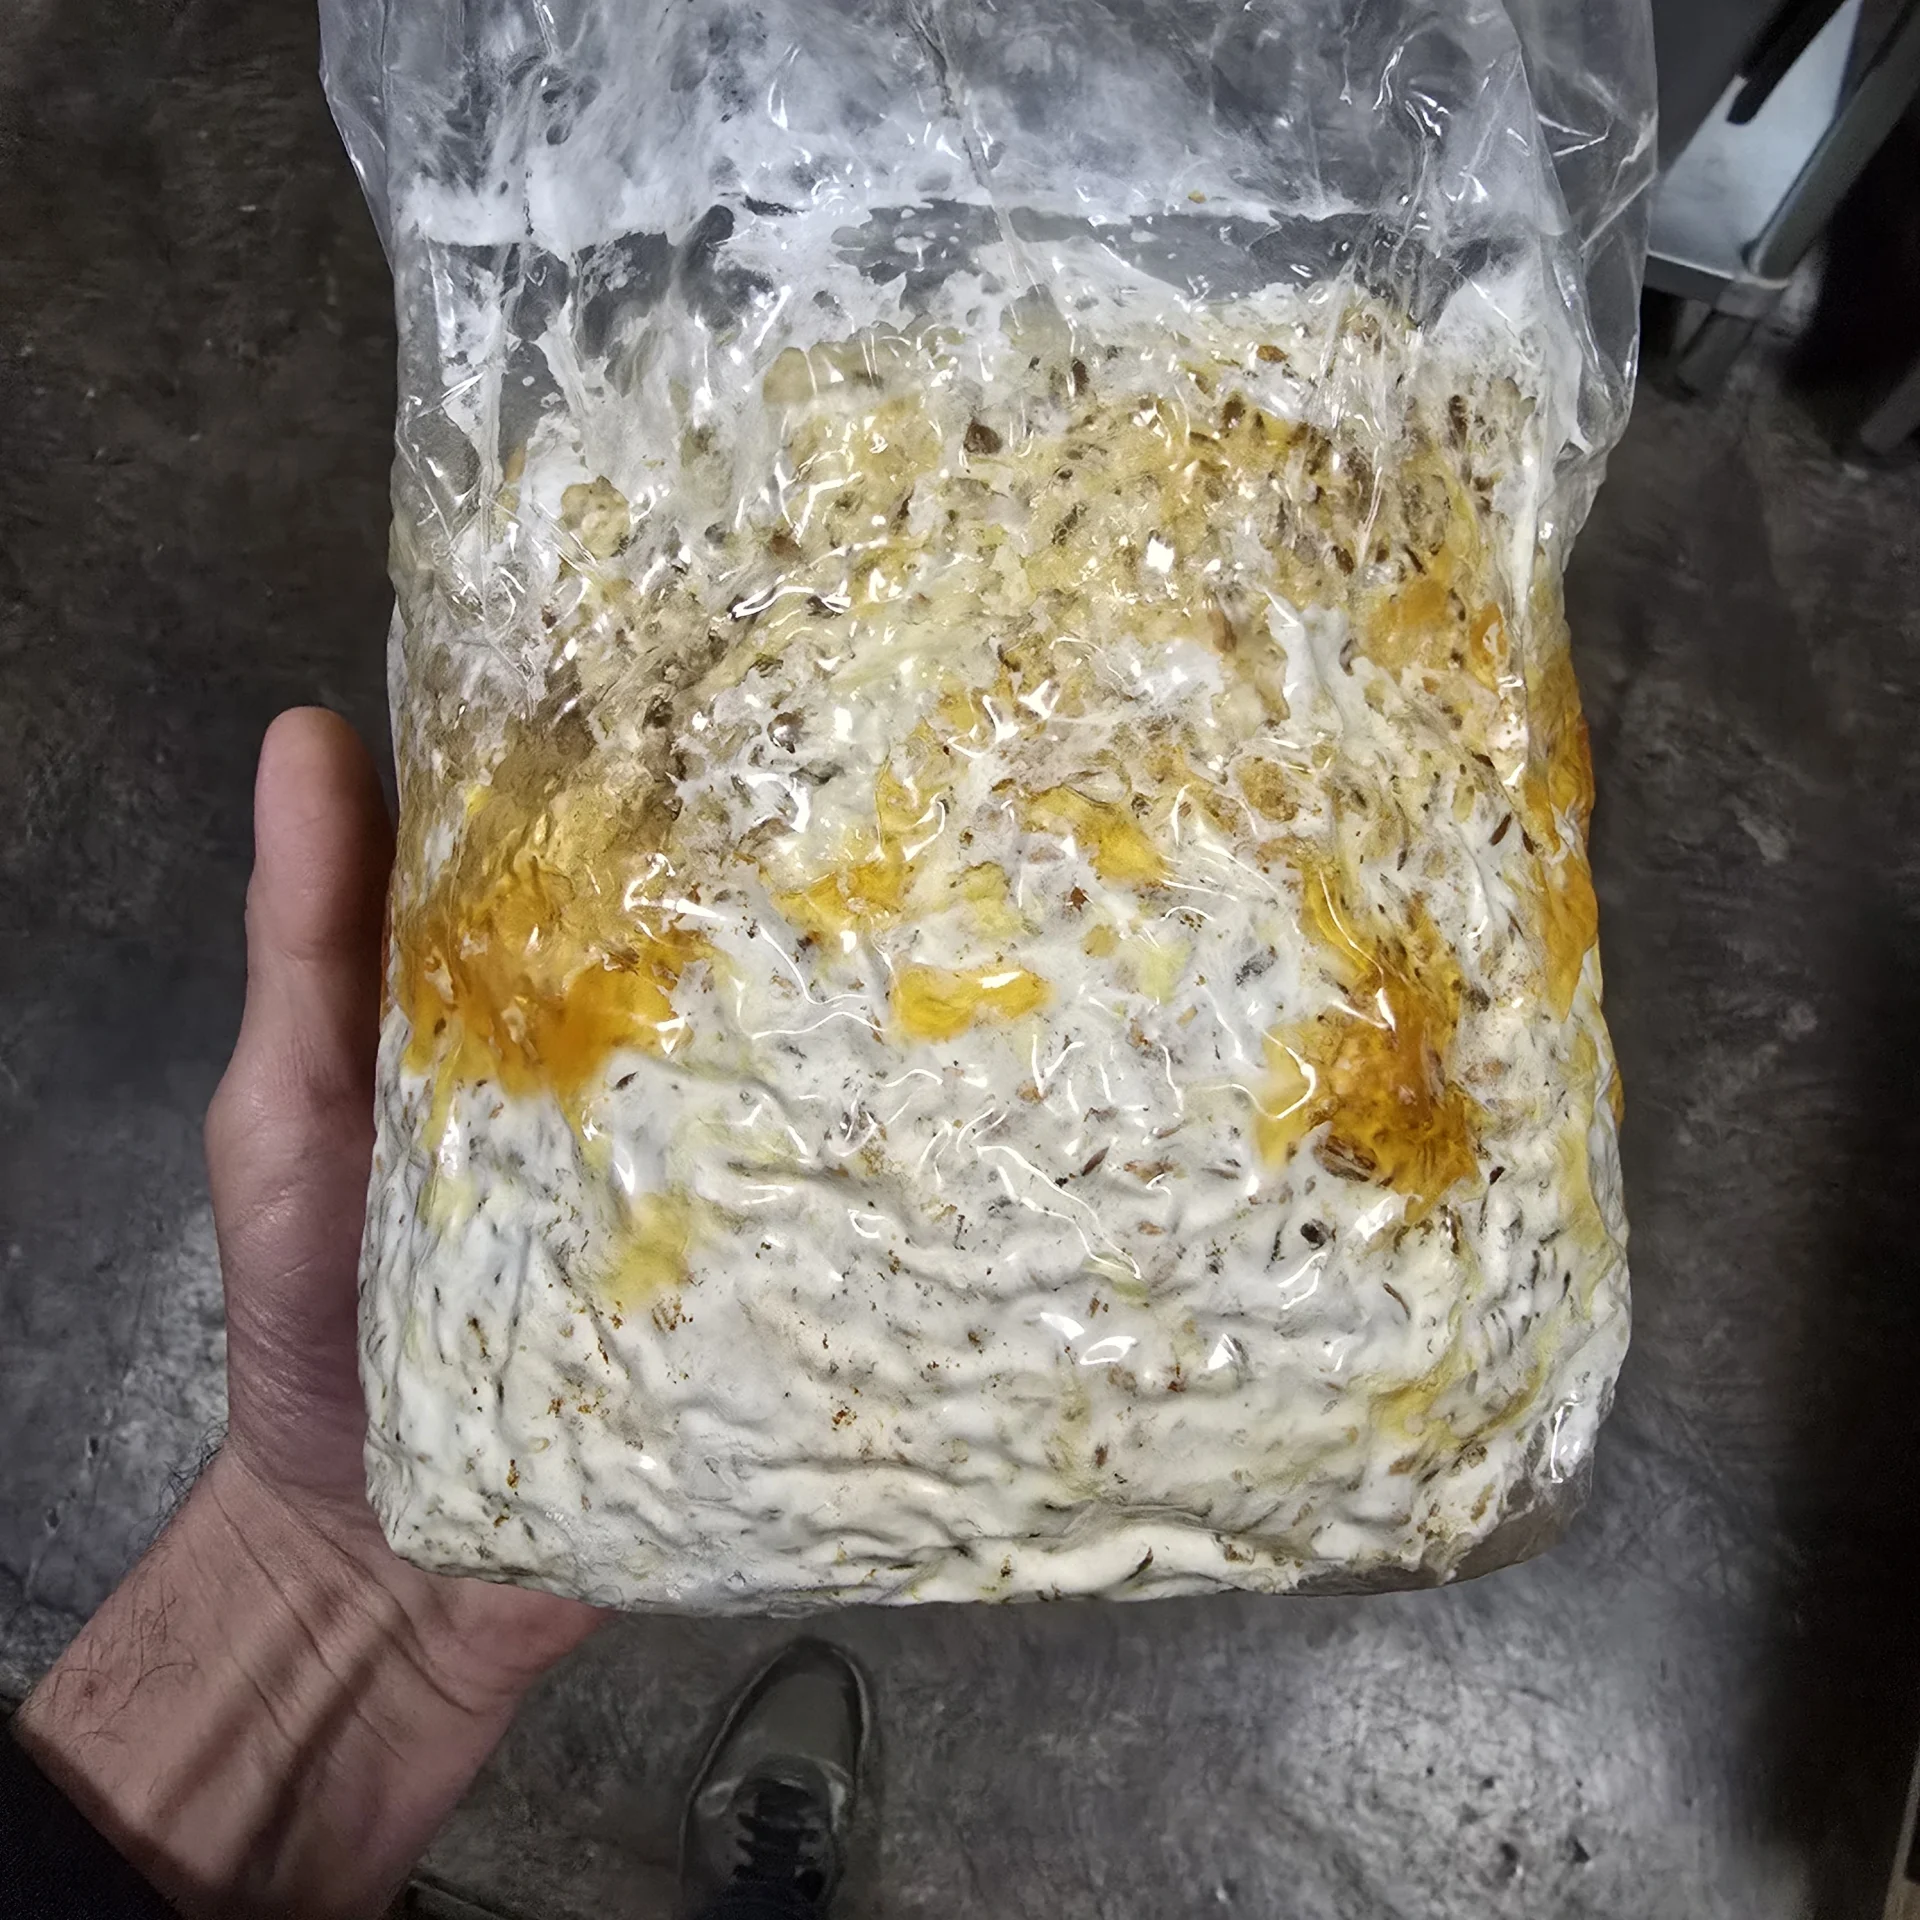
- Days 14 to 28 — Full colonization approaches. The entire surface should be uniformly white. You may see metabolites — yellow or amber liquid droplets — which are a normal stress response, not contamination
- Fruiting stage — Mycelium thickens, becomes more dense, and may develop a slightly lumpy texture as primordia begin forming
The key indicators of health are consistent white color, steady outward growth, and a clean earthy smell. Any sudden color changes, stalling, or foul odors warrant closer inspection.
This is a judgment call, but the safe default answer is no. If mushrooms fruited from a substrate block or container that also shows visible contamination, most experienced growers recommend discarding the entire harvest. The concern is not just what you can see — mold produces invisible mycotoxins that can permeate the substrate and potentially the fruiting bodies growing from it.
Factors to consider:
- Distance matters — If contamination is on the far side of a large block and mushrooms fruited from a clean area, the risk is lower but not zero
- Type of contamination — Trichoderma and especially Aspergillus produce harmful mycotoxins. Cobweb mold is less dangerous but still not ideal
- Timing — If mushrooms were nearly mature when contamination first appeared, the exposure was brief. If they grew alongside contamination from early stages, exposure was prolonged
What the science says:
- Mycotoxins are not destroyed by cooking
- Some mold metabolites can diffuse through substrate and into fruiting bodies
- There is limited research on exact contamination thresholds for edibility
When in doubt, throw them out. The cost of a single flush of mushrooms is never worth the risk of consuming mycotoxins, especially from Aspergillus species. Grow another batch from clean spawn instead.
Trichoderma and Penicillium are both common green molds, but they behave very differently in your grow space. Distinguishing between them helps you understand how aggressive the threat is and where your process failed.
Trichoderma characteristics:
- Starts as bright white aggressive mycelium, then turns green within 24 to 48 hours
- Grows extremely fast — can overtake a jar or bag in days
- Bright green to forest green color
- Produces a strong coconut-like or sweet chemical smell
- Extremely competitive — actively attacks and consumes mushroom mycelium
Penicillium characteristics:
- Appears as blue-green to teal powdery patches
- Grows more slowly than Trichoderma
- Has a distinctly dusty, flour-like surface texture
- Produces the classic musty "old bread" smell
- Less aggressively competitive but still fatal to your grow
Key visual test: Tilt the container. Penicillium spores will dust off the colony surface like powder. Trichoderma has a denser, more velvety texture that does not shed as visibly.
Both contaminants indicate a break in sterile technique, but Trichoderma is the more urgent threat because it spreads faster and can contaminate your entire grow space within hours if the container is opened indoors.
Trichoderma is one of the fastest-growing fungi on earth, and its speed is what makes it so devastating. Under warm, humid conditions — exactly the conditions you maintain for mushroom growing — Trichoderma can visibly expand several inches per day.
Typical timeline once Trichoderma appears:
- Hours 0 to 12 — A small white patch appears, often indistinguishable from mushroom mycelium except for its unusually aggressive growth rate
- Hours 12 to 24 — The center of the patch begins turning green as the colony matures and begins sporulating
- Hours 24 to 48 — The green area expands rapidly while new white growth continues at the margins. The colony may now cover several square inches
- Days 3 to 5 — An entire jar, bag, or block can be completely overtaken. Billions of green spores are being produced
Trichoderma spores become airborne at the slightest disturbance — opening a contaminated container, bumping a jar, or even air currents from walking past. Once spores are released, they settle on every surface in your grow space and can infect subsequent batches.
This is why the universal advice is to never open a Trichoderma-contaminated container indoors. Seal it, remove it from your growing area immediately, and dispose of it outside. Speed matters — every hour of delay increases the spore load in your space.
Yes, and this is one of the most underestimated contamination risks. Mold and bacteria do not need direct contact to spread — their spores travel on air currents, and a single contaminated container can seed an entire room with millions of invisible spores.
How airborne contamination works:
- Mold spores are microscopic and float easily on any air movement, including drafts from doors, fans, HVAC systems, and even convection currents from warm surfaces
- Trichoderma produces billions of spores per colony. Opening one contaminated jar indoors can deposit spores on every surface within the room
- Aspergillus spores are among the smallest and lightest, allowing them to travel farther and remain suspended in air longer
Containers at risk:
- Jars with loose lids or cracked filter patches are vulnerable because spores can enter through any opening larger than about one micron
- Bags with tiny punctures from handling or sharp substrate pieces
- Open fruiting chambers like shotgun tubs are inherently exposed
Protection strategies:
- Remove contaminated containers immediately upon detection — do not wait to see if it gets worse
- Run a HEPA air purifier in your growing space
- Space containers apart rather than stacking them tightly
- Never open or inspect a suspected contaminated container in the same room as healthy grows
Think of each contaminated container as an open jar of glitter — once the spores are out, they get everywhere.
If you keep getting contaminated grows in the same space, the problem is almost certainly environmental rather than bad luck. Recurring contamination means spores have established a persistent presence in your growing area, and each new batch gets infected from the room itself rather than from a single process failure.
The most common causes:
- Previous contamination released spores — Opening contaminated containers indoors deposits spores on walls, shelves, floors, and ceilings. These spores can remain viable for months or even years
- HVAC and ventilation — Your heating and cooling system circulates spores throughout the house. Dirty filters or return vents near your grow room are major sources
- Porous surfaces — Untreated wood shelving, carpet, cardboard, and fabric absorb and harbor spores
- Inadequate cleaning — Surface wiping with alcohol kills active mold but does not remove dormant spores from textured surfaces
How to break the cycle:
- Deep clean the space — Wipe all hard surfaces with a ten percent bleach solution. Remove any porous materials like cardboard or unfinished wood
- Replace HVAC filters and consider a standalone HEPA purifier running continuously in your grow room
- Switch to non-porous shelving — Metal wire racks that can be fully sanitized
- Review your entire workflow from substrate preparation through inoculation to identify the weakest link
Sometimes the best solution is to move your growing operation to a completely different room and start fresh with a clean environment.
No, green mold is not always Trichoderma, although Trichoderma is by far the most common green contaminant in mushroom cultivation. Several other mold genera can appear green, and distinguishing between them can help you understand the contamination source and adjust your prevention strategy.
Green molds you may encounter:
- Trichoderma — Bright green, fast-growing, starts white then turns green. The most aggressive and most common. Sweet or coconut-like smell
- Penicillium — Blue-green to teal, powdery texture, slower growth. Dusty surface that sheds spores visibly
- Aspergillus — Some species appear olive green to dark green. Granular texture rather than powdery or velvety
- Cladosporium — Olive green to dark green, often appears on damp surfaces. Slow-growing compared to Trichoderma
How to narrow it down:
- Growth speed — If it overtakes the container in two to three days, it is almost certainly Trichoderma
- Texture — Powdery suggests Penicillium, velvety suggests Trichoderma, granular suggests Aspergillus
- Starting color — Trichoderma starts white and turns green. Others often show color from the beginning
- Smell — Each has a characteristic odor, though you should avoid sniffing contaminated containers directly
For practical purposes, any green mold means that container is lost. The exact identification matters more for diagnosing your process failures than for deciding what to do with the contaminated grow.
In rare cases, healthy mycelium can hold contamination at bay, but true recovery — where contamination disappears — is extremely uncommon. What you sometimes see is a stalemate where strong mycelium creates a visible boundary line against a contaminant, preventing further spread without eliminating the threat.
Scenarios where mycelium may hold its ground:
- Fully colonized substrate — Once mycelium has completely colonized a block or jar, the dense network and metabolite production can resist minor contamination. This is why full colonization before fruiting is so important
- Strong genetics — Some mushroom strains are naturally more resistant to competitors. Aggressive oyster mushroom strains are particularly good at defending territory
- Minor bacterial contamination — Small bacterial colonies are sometimes walled off by healthy mycelium and do not spread
Scenarios where recovery will not happen:
- Trichoderma — Once established, Trichoderma virtually always wins. Its growth rate and competitive enzymes overwhelm mushroom mycelium
- Large contamination patches — If more than about ten percent of the surface is contaminated, the battle is lost
- Contamination during early colonization — The mycelium network is too sparse to mount an effective defense
Even when mycelium appears to win, the contaminated container should be isolated and watched closely. Do not place it back among healthy grows, and consider whether the mushrooms that fruit from it are safe to consume.
Wet spots in grain jars are caused by excess moisture in the grain, and they are a breeding ground for bacterial contamination. The wet, slimy kernels you see are grains where bacteria — most commonly Bacillus species — have taken hold and begun breaking down the grain.
The root causes almost always trace back to grain preparation:
- Over-soaking — Grain left in water too long absorbs more moisture than the mycelium can handle. Most grains need only twelve to twenty-four hours of soaking
- Insufficient drying — After simmering, grain must be spread out and dried until the surface moisture evaporates. Grains should feel dry to the touch and separate freely without clumping
- Too much water in the jar — Even a small amount of free water pooling at the bottom creates bacterial conditions
- Inadequate sterilization — Bacillus endospores are exceptionally heat-resistant and require a full ninety minutes at fifteen PSI to kill reliably
Troubleshooting steps:
- Reduce soak time by two to four hours and test results
- Extend drying time after simmering — spread grain on a clean towel or screen and let surface moisture fully evaporate
- Add dry vermiculite at roughly ten percent volume to absorb excess moisture
- Increase sterilization time to ninety minutes or longer if wet spots persist
If only a few kernels show wet spots, the mycelium may outrun the bacteria. But if more than a handful of kernels are slimy and translucent, discard the jar.
Yeast contamination is trickier to identify than mold because it often does not produce the dramatic colors you associate with contamination. Yeast typically appears as creamy white, tan, or slightly yellowish colonies that can look superficially similar to young mushroom mycelium to an untrained eye.
Key identifying features of yeast contamination:
- Texture — Yeast colonies are smooth, glossy, and sometimes slightly raised, unlike the fuzzy or thread-like appearance of mushroom mycelium. On agar, yeast forms discrete round blobs rather than radiating threads
- Color — Ranges from white to cream to pale yellow. Some yeast species produce pink or orange colonies (especially Rhodotorula)
- Smell — Often has a distinctly sweet, fermented, or bread-like odor
- Growth pattern — Yeast does not form the branching filamentous network you see with mycelium. It appears as expanding patches or a slimy film rather than visible threads
In liquid culture, yeast contamination may appear as:
- Cloudy broth without visible mycelial strands
- A thick sediment layer at the bottom
- Bubbling or gas production from fermentation
Yeast enters your grows through the same routes as mold — contaminated syringes, breaks in sterile technique, or airborne exposure. The most common source is contaminated liquid culture syringes. Always test new syringes on agar before inoculating grain to catch yeast before it ruins a whole batch.
Primordia — the tiny pins that are baby mushrooms — can look alarming to new growers who mistake them for contamination. These small bumps, knots, or irregular formations on the mycelium surface are actually the best possible sign: your grow is about to fruit.
How primordia look:
- Small white or off-white bumps that emerge from dense mycelium, usually one to five millimeters across initially
- They grow from the mycelium surface rather than appearing to sit on top of it
- Multiple primordia often appear in clusters or along edges where fresh air reaches the mycelium
- They change shape daily — getting taller, developing tiny caps, and eventually becoming recognizable as miniature mushrooms
How contamination looks different:
- Color — Contamination introduces colors the mycelium does not produce: green, blue, black, orange, or bright pink
- Texture — Mold contaminants are fuzzy, powdery, or slimy. Primordia are firm and solid
- Smell — Contamination often produces sour, sweet, or chemical odors. Primordia smell like fresh mushrooms
- Growth pattern — Contamination radiates outward in circular colonies. Primordia form as discrete bumps
The definitive test is patience. Watch the suspicious area for 24 to 48 hours. Primordia will grow into recognizable mushroom shapes. Contamination will change color, spread laterally, or develop powdery or slimy textures.
It is frustrating when a fully colonized block suddenly develops contamination, but it happens because the transition to fruiting conditions creates new vulnerabilities. Full colonization does provide significant protection — the dense mycelial network produces antimicrobial metabolites and physically occupies the substrate — but it is not an impenetrable barrier.
Why contamination strikes after colonization:
- Fruiting conditions favor competitors too — The increased fresh air exchange, higher humidity, and temperature changes you introduce for fruiting also create ideal conditions for mold and bacteria
- Physical openings — Cutting holes in bags, removing lids, or exposing substrate to open air creates entry points for airborne spores
- Weakened mycelium — The energy-intensive process of producing mushrooms diverts resources from defense, making the mycelium more vulnerable to attack
- Harvest wounds — After picking your first flush, the exposed substrate where mushrooms were removed is no longer protected by mycelium and can be colonized by competitors
Prevention strategies:
- Maintain clean fruiting conditions — HEPA filtration, regular surface sanitization, and sealed growing chambers
- Harvest cleanly — Cut or twist mushrooms at the base without tearing large chunks of substrate
- Monitor closely after first flush — The period between flushes is the highest-risk window for post-colonization contamination
A block that was clean through colonization but contaminates during fruiting usually points to airborne spore load in your fruiting environment rather than a sterilization or inoculation failure.
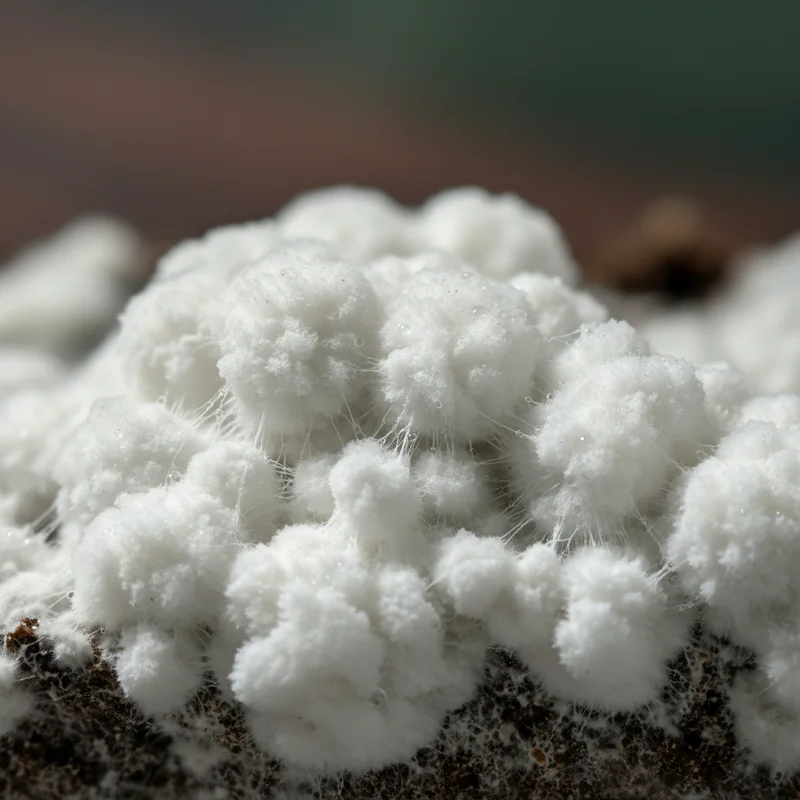
In the vast majority of cases, white fluffy growth on your mushroom substrate is exactly what you want to see — it is your mushroom mycelium. This is the single most common false alarm among new growers, and the anxiety is understandable because mushroom mycelium genuinely does look like a fuzzy white mold to the untrained eye.
Signs that the white fluffy growth is healthy mycelium:
- It grows outward from your inoculation points in a consistent radial pattern
- It smells clean — earthy, fresh, or slightly mushroomy
- It stays white as it matures (no color changes)
- Growth rate is steady — typically a few millimeters to a centimeter per day depending on species and temperature
- It has visible structure — either ropy, directional strands (rhizomorphic) or a cottony blanket (tomentose)
When to be concerned about white growth:
- Cobweb mold — Grows much faster than mushroom mycelium (inches per day), appears gray rather than bright white, and has an ultra-wispy appearance. Spray with hydrogen peroxide to test — cobweb collapses instantly while healthy mycelium is unaffected
- Aspergillus (white phase) — Some Aspergillus species start white before turning green or black. If white growth appears suddenly and rapidly in an area the mycelium has not reached, monitor it closely
When in doubt, wait 24 hours and observe. Healthy mycelium grows steadily and stays white. Contaminants change color, smell, or growth pattern as they mature.
Yes, most contaminated mushroom substrate can be composted, but with important caveats depending on the type of contamination. Composting is actually the most environmentally responsible disposal method for the majority of contaminated grows, and the composting process itself generates enough heat to kill most contaminants.
Safe to compost:
- Trichoderma-contaminated substrate — Trichoderma is actually a beneficial soil organism and is used commercially as a biocontrol agent in agriculture. Composting it is perfectly fine, though keep the compost pile away from your growing area
- Bacterial contamination — Bacteria break down quickly in a hot compost pile
- Cobweb mold — Harmless in an outdoor compost environment
- Spent substrate (no contamination) — Excellent compost material rich in organic matter
Use caution or avoid composting:
- Aspergillus (black mold) — If you are sure the contamination is Aspergillus, bag it and dispose in outdoor trash rather than composting. Aspergillus spores are extremely persistent and can cause health issues
- Unknown contamination — If you cannot identify the contaminant, err on the side of trash disposal
Composting best practices:
- Bury contaminated substrate at least six inches deep in the center of the pile where temperatures are highest
- Keep the compost pile far from your growing space — at least fifty feet if possible
- Never compost indoors or in enclosed spaces
Many growers report volunteer mushrooms sprouting from their compost piles months later, which is a pleasant bonus of composting colonized substrate.
Wet bubble disease is caused by the fungal pathogen Mycogone perniciosa and is one of the most damaging mushroom diseases worldwide, particularly affecting button mushrooms (Agaricus bisporus) but also impacting oyster, shiitake, and other cultivated species.
How to identify wet bubble disease:
- Early stage: Infected mushrooms develop amber to dark brown liquid droplets on the cap surface — this is the hallmark "wet" symptom that gives the disease its name
- Deformed fruiting bodies: Mushrooms become swollen, lumpy, and misshapen, often described as looking like a cauliflower or a shapeless white mass
- Stipe thickening: Stems become abnormally thick and bulbous
- Brown discoloration: Infected tissue turns progressively darker brown as the disease advances
- Foul smell: Advanced infections produce a strong, unpleasant odor
How it spreads:
- Airborne spores and water splash between fruiting bodies
- Contaminated hands, tools, and clothing during harvest
- Infected casing soil or substrate
- Spores can survive in the environment for years
Prevention and treatment:
- Strict hygiene — wash hands and sanitize tools between harvesting from different blocks
- Remove infected mushrooms immediately — seal in a bag before removing from the fruiting area
- Increase air circulation — stagnant, overly humid conditions promote wet bubble
- Reduce humidity slightly to 85-88% rather than 95%+
- There is no cure for infected mushrooms — prevention is the only reliable strategy
If wet bubble appears in your grow, discard all affected blocks and deep-clean the entire fruiting area before introducing new substrate.
Dry bubble disease is caused by Lecanicillium fungicola (formerly Verticillium fungicola) and is the most common fungal disease affecting commercial mushroom farms. Unlike wet bubble, dry bubble produces dry, leathery deformities rather than liquid symptoms.
How to identify dry bubble disease:
- Bent or tilted stipes — mushroom stems lean or curve abnormally
- Peeling cap skin — the cap surface cracks or peels, revealing dry white tissue underneath
- Bubble-like deformities — small, round, dry bumps appear on the cap or stem surface
- Gray-brown spots — irregular discolored patches that feel dry to the touch
- Undifferentiated tissue masses — in severe cases, mushrooms fail to form normal cap-and-stem structure and instead produce shapeless lumps of tissue
- Size reduction — infected mushrooms remain small and stunted
Key differences from wet bubble:
- Dry bubble produces dry, leathery symptoms vs wet bubble's amber liquid droplets
- Dry bubble deformities are smaller and more localized vs wet bubble's massive swelling
- Dry bubble spreads primarily through direct contact and water splash rather than airborne spores
Prevention:
- Harvest with clean hands and sanitized knives — dry bubble spreads readily on contaminated harvesting tools
- Do not water mushrooms from above — overhead watering splashes spores between fruiting bodies. Use fine mist directed upward or onto chamber walls
- Maintain good air circulation to keep cap surfaces dry
- Remove and bag infected mushrooms immediately before spores spread to neighboring clusters
Dry bubble is less catastrophic than wet bubble but more persistent — it can establish low-level chronic infections that reduce yields by 10-30% without producing dramatic visible symptoms.
Bacterial blotch is the most common bacterial disease in mushroom cultivation, caused primarily by Pseudomonas tolaasii (brown blotch) and Pseudomonas gingeri (ginger blotch). It creates unsightly discoloration that makes mushrooms unmarketable even though they remain technically edible.
Types and identification:
- Brown blotch (P. tolaasii) — dark brown, slimy, sunken lesions on the mushroom cap. The affected tissue is soft and sticky to the touch. Most common and most damaging form.
- Ginger blotch (P. gingeri) — yellowish-brown to ginger-colored spots that are less slimy than brown blotch. Often appears as discrete round patches.
What causes bacterial blotch:
- Water sitting on mushroom caps — the single biggest risk factor. Water films provide the environment bacteria need to multiply and infect tissue
- High humidity above 95% combined with poor air circulation
- Overhead misting that wets mushroom caps directly
- Harvesting with wet or contaminated hands — bacteria transfer between mushrooms on contact
- Temperature above 20°C during fruiting accelerates bacterial growth
Prevention strategies:
- Never allow water to pool on mushroom caps — this is the golden rule
- Mist chamber walls and floor, not the mushrooms themselves
- Maintain humidity at 85-92% rather than 95%+ — slightly lower humidity dramatically reduces bacterial blotch
- Increase FAE — moving air dries cap surfaces and reduces the water films bacteria need
- Harvest before caps fully flatten — mature, flat caps collect more water than convex ones
- Keep fruiting temperature at 15-18°C where bacterial growth is slower
Bacterial blotch is almost entirely preventable through environmental management. If you see it appearing, reduce humidity by 3-5% and increase air exchange immediately.
Need more help? Dr. Myco can answer follow-up questions about advanced contamination diagnosis based on thousands of real growing experiences.
Ask Dr. Myco